Tutorial: Change the Lexus IS250 Headlight Bulbs to LEDs

This is a tutorial post to show you how to install H11 led bulbs on Lexus IS250. My car is the halogen models, now I’m going to show you how to replace the halogen headlight bulbs to LEDs step by step.

1) There are all these plastic panels we have to take them apart. But the first I recommend to take off the negative terminal on the battery, and then take off the panels, you can push them down or just lift them up with a flathead.

1

2

2) There are two little screws and just unscrew it with like a flathead. The next thing take out the airflow box, just unclip it. After you take off all the clips, I also took it off the engine cover, because it connects to the airflow box and I have to disconnect it. Then, we get enough space to put our hand in, twist it and take the halogen bulb off.

3

Here is the bulb, it is H11 base, used for low beam pattern.

6

We have the replacement H11 led bulbs and they should screw in directly, and plug right into the same hole. Here you should note that, don’t buy a led headlight with huge heat sink on the bottom cause that would lead to a problem, dust cover couldn’t be installed back with led headlight, then headlamp housing is possible to be foggy in the future.

7

When led headlights are installed, we will put everything back. Don’t forget to plug the airflow box back in as well as the hose. It needs to connect that back, just push them back in and screw that screws in.


As to replace the low beam halogen bulb on another side, you just take off this.

8

From here you will be able to access to the bulb. Twist it, and it will come out. Then you are able to install a H11 led headlight bulb, and then you just put all of these pieces back together.

9

This is how it looks like with h11 led headlight bulbs. Not bad, right?

10 (1)

how to install h11 led bulb on Lexus IS250

I really like these I think these are awesome see this is during the night. The light looks great, nice white bright lights of the ground. It’s not too blinding, crisp light looks modern style. I highly recommend this replacement.


How to Adjust Headlights for the Perfect Aim!

How to Adjust Headlights for the Perfect Aim!

https://ledoautoblog.wordpress.com/Have you ever been blinded by someone else’s headlights, or noticed that your own headlights are not illuminating the road directly in front of you? If all you can see is the foliage on the side of the road, or oncoming drivers are constantly flashing their high beams or honking their horn at you, most likely your headlights are misaligned and giving those other drivers an eyeful. They’re easy to adjust with a few measurements and a screwdriver.  As the automotive lighting manufacturer in China, we are going to tell you how to adjust headlights for the perfect aim step by step.

1, Level your car.

Start by removing any excess weight from the trunk of the car. Also, ensure that the tire pressure in all tires is at the manufacturer’s recommended levels. If possible, have somebody sit in the driver’s seat, and that the gas tank is half-full. As well as this, check that your headlight aim adjustment wheel (if fitted) is at the zero position.

2, Position your car.

On level ground, park 10 to 15 feet (3.0 to 4.6 m) from a dark wall or garage door, with the front of the car aimed at the wall. A paved parking lot or level driveway is best.

  • Bounce the car a couple times on all four corners to make sure the shocks are leveled.
  • Measure the distance to the ground from both headlights to ensure that the suspension itself is level.

How to Adjust Headlights for the Perfect Aim! 2

3, Turn the headlights on.

Do not use your high beams or fog lights. Mark the horizontal and vertical center lines of the headlight beams with masking tape to make two T’s on the wall or garage door.

How to Adjust Headlights for the Perfect Aim! 3

4, Make sure the lights are level.

Place a carpenter’s level between the two marked center lines to see if they are even. If they are not even, use a tape measure to measure how far up the wall the lower mark is and lower the other center line marker to the same height. These center lines should be no higher than 3.5 feet (1.1 m) from the ground.

How to Adjust Headlights for the Perfect Aim! 4

5, Back your car exactly 25 feet (7.6 m) from the wall or garage door.

Don’t estimate the distance! Use a tape measure to make sure you are the proper distance away from the wall. Turn off the headlights. Remove the trim ring from around the headlights and locate the adjusting screws. These screws are typically found adjacent to the headlight, though some manufacturers put the screws in the engine compartment, behind the the headlights. The horizontal adjuster and the vertical adjuster should be marked.

  • Always defer to the specs in the owner’s manual—some manufacturers recommend different distances for proper adjustment. For example, Toyota recommends 10 feet (3.0 m) feet, Pontiac GTO recommends 15 feet (4.6 m), and Chrysler recommends 3 feet (0.9 m) for some models. For this reason, it’s important to check your owner’s manual and follow those guidelines.
  • There should be one screw at the top of the headlight to adjust vertically and another screw to one side of the headlight to adjust horizontally, though some cars may feature adjustment bolts rather than screws.

How to Adjust Headlights for the Perfect Aim! 5

How to Adjust Headlights for the Perfect Aim! 6

6, Adjust each headlight separately. Block one with a sweatshirt or other object while adjusting and testing the other, since the light-bleed can make it difficult to distinguish one from the other. Have a helper sit in the driver’s seat while you do the adjustments, to turn the lights on and off while you make the proper adjustments.

How to Adjust Headlights for the Perfect Aim! 7

7, Turn the upper screw or bolt to adjust the vertical field. Clockwise turns should raise the lights, while counterclockwise turns should lower the lights.

  • Turn the headlights on after adjusting and look at the light pattern on the wall. The top of the most intense part of the beam should be even with, or just below the center of the line of tape you made.

How to Adjust Headlights for the Perfect Aim! 8

8, Turn the side screws or bolts to adjust the horizontal field. Now, you’ll do basically the same thing with the right-left adjustment. The majority of the intense part of the beam should be to the right of the vertical line (or to the left of it if you drive on the left side of the road)

How to Adjust Headlights for the Perfect Aim! 9

9, Test your alignment on the road. Take your car out for a test drive to make sure the headlights are adjusted properly. Readjust if necessary by repeating the above steps.

How to Adjust Headlights for the Perfect Aim! 10

Get more information here automotive led lighting manufacturers

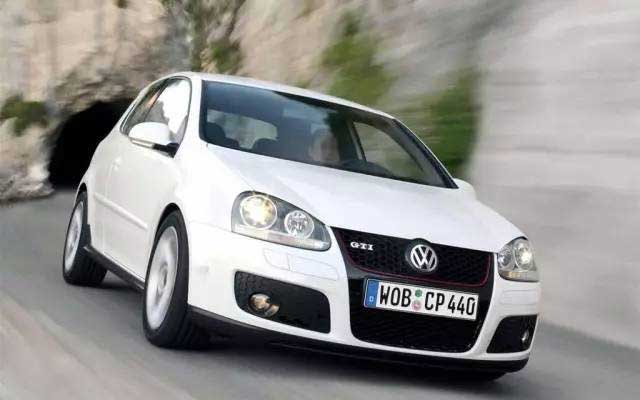
Golf MK5 Modified to Dating Weapon, 100% Improve Dating Success Rate

As VW Golf MK4 sold poorly in China, when released, Volkswagen didn’t choose to market GOLF MK5 in China n but thought we would launch VW Sagitar developed for Chinese marketplace, thus all Golf MK5 in China is imported in order that numerous Golf followers can’t spend the money for the price.

Golf-GTI-Tiffany-green-Style-Modification-with-Player-on-the-trunkGolf-GTI-Tiffany-green-Style-Modification-with-Player-on-the-trunk

We are the led headlight bulbs for cars supplier – LedoAuto. Here to talk about a Golf MK5 GTi modified project. This Golf is a three-door edition using the circular front and back headlights, that is the feature design of this generation, the entire look will be fatter a whole lot than Golf MK4.

Golf-GTI-Tiffany-green-Style-Modification-with-Player-on-the-trunkGolf-GTI-Tiffany-green-Style-Modification-with-Player-on-the-trunk

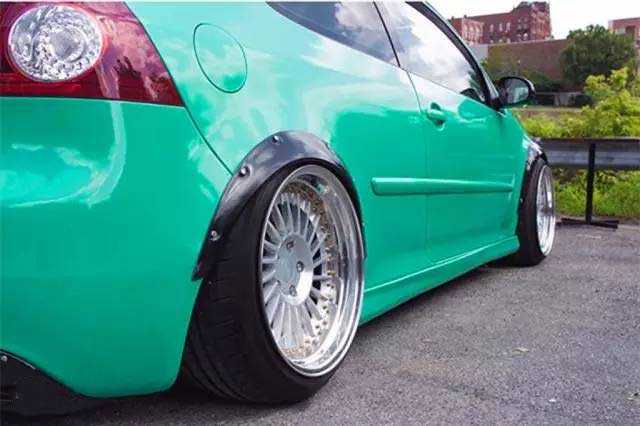
The automobile was originally balck, the owner put an extremely fresh Tiffany green color film onto it, and installed on the Thunder Bunny body kit to create it vary, featured the customized front bumper lip to become sports.

Golf-GTI-Tiffany-green-Style-Modification-with-Player-on-the-trunkGolf-GTI-Tiffany-green-Style-Modification-with-Player-on-the-trunkGolf-GTI-Tiffany-green-Style-Modification-with-Player-on-the-trunkGolf-GTI-Tiffany-green-Style-Modification-with-Player-on-the-trunk

Following the removal of the initial brand logo, the automobile has been particularly simple and fresh, the owner didn’t choose to change the R32 twice exhaust in the centre, and choose single-sided twice exhaust, with rivet-style beneath the spoiler. At exactly the same time, on wind spoiler, he can make a simple broad body, brings just a little rough style.

Golf-GTI-Tiffany-green-Style-Modification-with-Player-on-the-trunkGolf-GTI-Tiffany-green-Style-Modification-with-Player-on-the-trunkGolf-GTI-Tiffany-green-Style-Modification-with-Player-on-the-trunkGolf-GTI-Tiffany-green-Style-Modification-with-Player-on-the-trunk

This Golf was built with height adjustable damper, around the footers they’re Rotiform IND 18 inch 10.5J wheels.

Golf-GTI-Tiffany-green-Style-Modification-with-Player-on-the-trunkGolf-GTI-Tiffany-green-Style-Modification-with-Player-on-the-trunkGolf-GTI-Tiffany-green-Style-Modification-with-Player-on-the-trunk

Though it is height adjustable damper, the owner is quite creative to produce an unique modification. He installs an extremely classic cassette game player on the trunk, it really is therefore humorous to try out them within the celebration and completely can appeal to several ladies.

Golf-GTI-Tiffany-green-Style-Modification-with-Player-on-the-trunkGolf-GTI-Tiffany-green-Style-Modification-with-Player-on-the-trunkGolf-GTI-Tiffany-green-Style-Modification-with-Player-on-the-trunk

The changes doesn’t have to help make the car too exaggerated, such as this Golf MK5, chosen a brand new color, by way of a simple match up, it simply brings about another feeling, stood from monotonous modified cars.

Golf-GTI-Tiffany-green-Style-Modification-with-Player-on-the-trunkGolf-GTI-Tiffany-green-Style-Modification-with-Player-on-the-trunkGolf-GTI-Tiffany-green-Style-Modification-with-Player-on-the-trunkGolf-GTI-Tiffany-green-Style-Modification-with-Player-on-the-trunkGolf-GTI-Tiffany-green-Style-Modification-with-Player-on-the-trunkGolf-GTI-Tiffany-green-Style-Modification-with-Player-on-the-trunkGolf-GTI-Tiffany-green-Style-Modification-with-Player-on-the-trunk


Volkswagen Passat Install 3D Design LED Dome Light and Number Plate light

This is a magical market. We can find many interesting and new developed products with wonderful design in China. Today I’d like to recommend you this 3D design T10/194 LED bulb. We all know T10 LED lighting are widely applied to cars as interior light and number plate light. Users should concern on installation and lighting, plug and play is important, soft and bright lighting is necessary too.

These 3D design T10 LED bulbs use Osram LED chip with PC cover on it, lighting is bright but soft, it isn’t like other T10 bulbs which have LED on surface directly, that lighting is glaring and eye can’t look directly. I installed these on my 2012 Volkswagen Passat- what a major upgrade! Looks amazing, the bulb is rated at 6000K, color is very white and crisp. I took literally 30-45 seconds to install each one, no load resistors needed. I feel like these are a great deal for the price, nearly 1.9$ per pcs only. They are listed as street-legal for car as interior light and number plate light, so I have no worries about safety or legality.

These automotive led light bulbs come with a 2 year warranty.

2012-Volkswagen-Passat-Install-3D-Design-T10-LED-Lighting-32012-Volkswagen-Passat-Install-3D-Design-T10-LED-Lighting-12012-Volkswagen-Passat-Install-3D-Design-T10-LED-Lighting-2


Audi Q5 Install Super Bright OEM Fog Lamp Kit

Audi Q5 original headlight has good spotlight and long distance of radiation. This headlight work wonderful while running on highway, driver can see clearly what it is in 50 meters away. But the lighting is not bright enough within 5 meters. On the way from office to my house, A section of road pavement is particularly poor, very bumpy, I need to drive carefully to avoid some pits on the road. In this situation, Audi Q5 original headlight offer limited lighting. I have to turn on both front fog lights to supply lighting to road pavement.

This is a OEM fog lamp kit for Audi Q5, it has same plug with original fog light and can directly replace it. 2800Lumen, double brighter than the original one. I see it isn’t too expensive but is really helpful to improve my fog light performance. So I decide to install this kit on my car.

This is the packing. I can see a row of led lights inside it.

audi-q5-retrofit-fog-light-with-cree-oem-type-led-fog-lamp-1

This screw and spring are used for adjusting the beam angle.

audi-q5-retrofit-fog-light-with-cree-oem-type-led-fog-lamp-2

Remove the fog light cover, there are three snap on the top middle, bottom middle, left side middle. But on right side middle of cover, they are two pieces of tongues, not snap.

audi-q5-retrofit-fog-light-with-cree-oem-type-led-fog-lamp-3

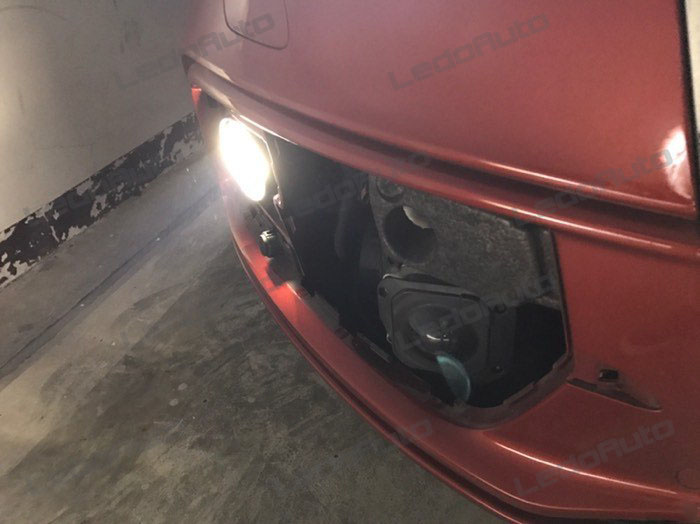
Remove the fog light. There are two screws on the top middle and bottom middle. Loose the screw and pull out the fog light. Disconnect the fog light plug, install the new fog lamp.

audi-q5-retrofit-fog-light-with-cree-oem-type-led-fog-lamp-4audi-q5-retrofit-fog-light-with-cree-oem-type-led-fog-lamp-5

After installation, please don’t be hurry to install the cover back. Test the new fog light kit, adjust the beam angle until the lighting is being cool.

audi-q5-retrofit-fog-light-with-cree-oem-type-led-fog-lamp-6

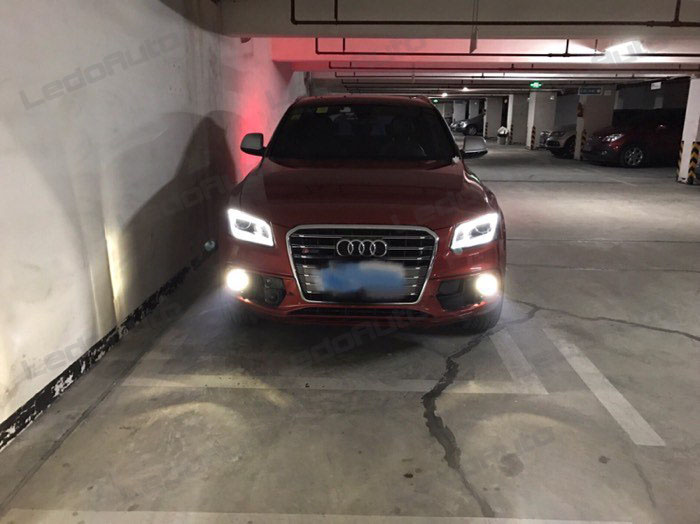
This is the right lighting effect of new OEM fog light.

audi-q5-retrofit-fog-light-with-cree-oem-type-led-fog-lamp-7

Turn on original low beam headlight only.

audi-q5-retrofit-fog-light-with-cree-oem-type-led-fog-lamp-8

Turn on new OEM fog light + low beam headlight.

audi-q5-retrofit-fog-light-with-cree-oem-type-led-fog-lamp-9

Turn on new OEM fog light + high beam headlight.

audi-q5-retrofit-fog-light-with-cree-oem-type-led-fog-lamp-10

This fog light is spotlight and not shine.

audi-q5-retrofit-fog-light-with-cree-oem-type-led-fog-lamp-11audi-q5-retrofit-fog-light-with-cree-oem-type-led-fog-lamp-12

 The R&D Automotive LED Light Bulbs Manufacturer | LedoAuto

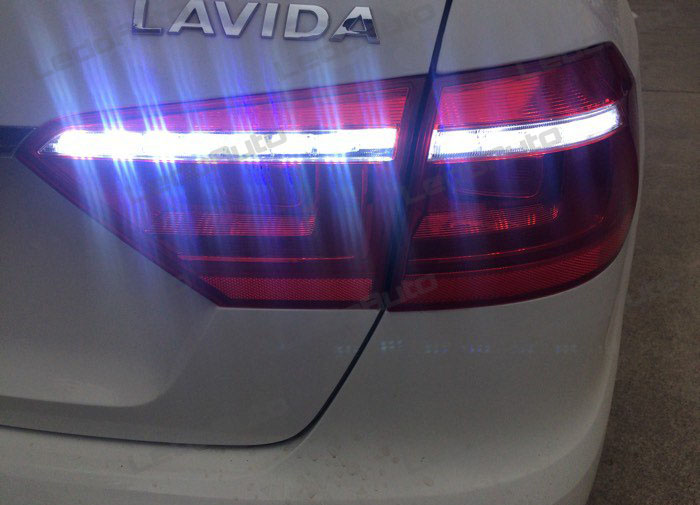
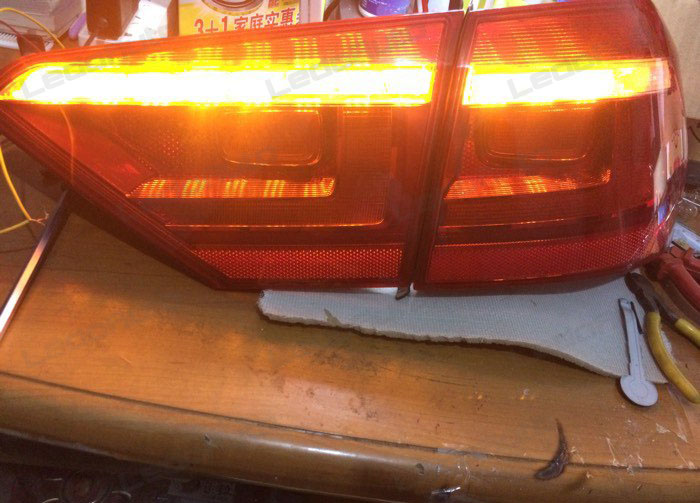
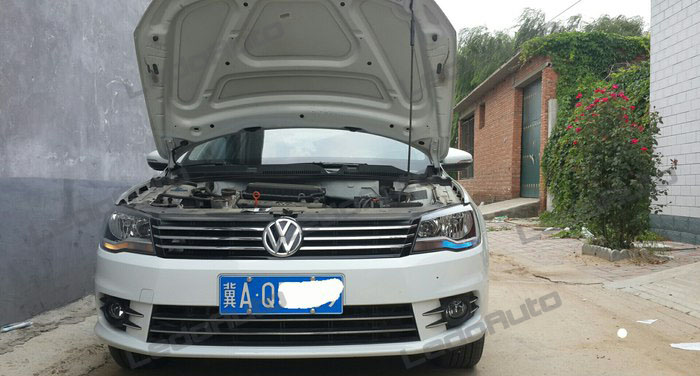
Volkswagen LAVIDA Installed LED Scanner Turn Signal Light

I always love led scanner light, like the original turn signal light of Ford Mustang, that is really awesome.

Sometimes I am thinking if it is possible to modify a led scanner light on my Volkswagen LAVIDA, but there is no many led headlamp housings made for LAVIDA on the market, and sadly most of them are created for adding LED DRL function, no scanner light.

So I am thinking a simple way to achieve scanner light function. Then I find it is possible to fix a led strip light into the taillight, powered it by turn signal light wires, make it light up while I turn on the turn signal light and show scanner effect. That is my idea, it succeed by my DIY and looks cool, please see my practice and the final effect.

volkswagen-lavida-installed-led-scanner-turn-signal-light-1volkswagen-lavida-installed-led-scanner-turn-signal-light-2volkswagen-lavida-installed-led-scanner-turn-signal-light-3volkswagen-lavida-installed-led-scanner-turn-signal-light-4volkswagen-lavida-installed-led-scanner-turn-signal-light-5%e6%9c%97%e9%80%b8%e6%b5%81%e5%85%89%e8%bd%ac%e5%90%91%e7%81%af_%e6%a0%87%e6%b8%85_clip

15 min Upgrading Volkswagen Bora LED DRL

Everyone say Bora original DRL is ugly. But similar to Golf, it is very easy to replace Bora original DRL. How to do it? You can just refer to my article Upgrading Golf 7 LED Daytime Running Light.

The Difference is Golf 7 with DRL light on the right of headlight bulb, while Bora wit DRL light on the downside of headlight bulb. When replacing the bulbs on Bora, small hand could be much easier to stick in and rotate the original DRL adapter, get the bulb out.

The whole replacing process takes nearly 15min. DRL lighting improve so much. Here I recommend you cool blue LED daytime running light, compared to yellow Incandescent light, cool blue led DRL seem to stand out a lot.

volkswagen-bora-upgrading-led-daytime-running-light-1volkswagen-bora-upgrading-led-daytime-running-light-2volkswagen-bora-upgrading-led-daytime-running-light-3volkswagen-bora-upgrading-led-daytime-running-light-4

Upgrading Golf 7 LED DRL with Xenon White LED Light

Do you like Golf 7 factory original DRL? I think many Golf 7 owner say no. That yellow small eyes, no wonder are named it candle light. Fortunately, it is easy to replace this pair of DRL bulbs. Open the lip, look at the place behind your headlamp, there is a plastic cover. Open that cover, find where the DRL are according to its position in the headlamp, pull it out and we can replace it. Golf 7 DRL bulbs are PW24W base. Not too many bulbs with this base on the market. I recommend you to buy Cree 50W High Power LED Bulbs. Cree chips, high lumen, high working current and not easy to break. Especially the working current, Cree bulb could reach 10W and reach the requirement of inspect system. You won’t meet CANBus problem after Installation.

Here is my installation process and lighting effect.

volkswagen-golf-7-upgrading-pure-white-led-daytime-running-light-1volkswagen-golf-7-upgrading-pure-white-led-daytime-running-light-2
volkswagen-golf-7-upgrading-pure-white-led-daytime-running-light-3

Romantic Cool Blue LED Interior Light Modified on Volkswagen MAGOTAN

White, yellow are the popular color for car interior light. But there are alternative car enthusiast like me who love cool blue interior light.  These lights make ordinary car look amazing and sport used in conjunction with led accent light.

So many car enthusiast like to modify their Camaro or BMW with this car light. But for the traditional and classic Volkswagen cars, we seldom see this light on them. Maybe because most of Volkswagen car driver are the mature guys.

But see this Volkswagen MAGOTAN, after modified the cool blue car interior light, it looks young and fashion. If add the led logo projector light, it will look wickedly cool

Volkswagen MAGOTAN Modify Cool Blue LED Interior Light 1Volkswagen MAGOTAN Modify Cool Blue LED Interior Light 2Volkswagen MAGOTAN Modify Cool Blue LED Interior Light 3Volkswagen MAGOTAN Modify Cool Blue LED Interior Light 4Volkswagen MAGOTAN Modify Cool Blue LED Interior Light 5